Showing posts with label tf2. Show all posts

Sunday, 2 June 2013

NEWS: Sunday Update

Hi everybody!

This week's update is a day late because I had my junior high school's sports festival yesterday, and afterwards went to an Izakaya (Japanese pub) with my co-workers and got absolutely plastered.

It was a good festival all up. My school is in a beautiful location at the foot of the mountains, and at this time of year it was just the right amount of sun and cool spring breezes to make the event really enjoyable. As an added bonus this year I was actually given a task. I was in charge of the video camera, so I spent most of the time following the kids around and filming the various events. That is of course when I wasn't being swarmed by elementary school kids who came to watch their older brothers and sisters.

It was nice to actually be included and actually be given a job, however small it was. Usually at these things I just sit around being bored off my ass, so it was nice to actually be treated like another teacher for once.

I'm also pretty sure I got some rad street cred with my teachers at the party, when my Kyoto-sensei (vice principal) showed me his completely clean plate after having some grilled fish. "I ate everything," he boasted, "even the skin and the bones." "まけγͺい!(I'll never lose!)" I replied, turning back to my plate and finishing off my own skin and bones.
Takabayshi Junior High School's Sports Festival (I think the faces are indistinguishable enough to get by Japan's censorship laws)
As for gaming news, here are last week's top stories:
Story of the week:

Okay guys, that's it from me for this week! Be sure to subscribe to my twitter for up-to-date news and blog updates, my youtube channel for gaming videos, and check back here every Saturday for a roundup of my Escapist news pieces!

    Wednesday, 26 September 2012

    GUIDE: (Video) In-Depth Look at Team Fortress 2's Spy


    As promised, here is the second in my series of nine class guides for Team Fortress 2, this time featuring the Spy! I've also got a special treat for you guys today: I'm giving away a Fancy Fedora to one lucky reader! To enter, send me the following tweet (without the quotes) on twitter:

    "@StevenBogos I want a Fancy Fedora! #stevesgameblog"

    A winner will be chosen at random and announced on Saturday, the 29th of September. Enjoy the video!


    TRANSCRIPT:

    So my in-depth heavy guide quickly became my most-viewed video I’ve made since starting my blog, meaning I must have done something right, so I’m doing it again! This time I’m having a look at my second favourite class, and the class that, in contrast to how easy the heavy is to learn, is probably the most complicated for beginners to get the hang of – the Spy.

    He does draw some similarities with the heavy though – proper positioning is incredibly important and the element of surprise is your greatest weapon.

    Let’s have a look at what the spy keeps in his bag.

    We’re going from the bottom up this time, starting with sappers. There are only two spy sappers, the vanilla sapper and the ‘red tape recorder’. Stick with the vanilla sapper. As far as I have seen, the ‘red tape recorders’ gimmick of reversing construction in no way makes up for the damage penalty it receives. The vanilla sapper is better in every situation.

    Next up is watches. Watch choice is quite significant in that different watches can completely alter your playstyle. This guide is built around the dead ringer, which even after its numerous, numerous nerfs, Is still the most versatile watch out there. It lets you feign death and become invulnerable for a short time, with the only downside of not being able to cloak at will and making a louder noise when decloaking – both of which are fairly easily remedied. This watch allows you to safely fall behind enemy lines, quickly retreat, and fool your enemies into thinking you are dead. After all, simply evading your foes by hiding and cloaking means you still remain a threat, but if you provide them with a ‘realistic death’ you can drop off their radar.

    The cloak and dagger has its uses if you are a much more patient man than I am. I feel it’s better than the vanilla watch in that you can remain cloaked indefinitely, and don’t feel tied to seeking out ammo pickups.

    Let’s talk knives. While technically equipped as your ‘secondary,’ they are pretty much your primary weapon. You can’t go wrong with the vanilla knife. It’s remained pretty much unchanged from Team Fortress Classic and most of the unlocks that have come along since pale in comparison. It gets the job done and what I recommend for about 90% of spies. Looking at the other knives, I honestly can’t see a use for the big earner and the connivers kunai. They both have some interesting effects, but the downsides are too drastic to recommend them over the vanilla knife. Your Eternal Reward is an interesting mechanic, but again, not being able to disguise at will is such a huge detriment to the disguise-as-killed-enemy feature.

    There is one knife that I can recommend the use of outside of the vanilla knife, and that is the spycicle. It functions pretty much exactly the same as the normal knife, but has ‘silent’ kills that don’t show up in the enemy’s killfeed, and gives you two seconds of fire invulnerability if set on fire. The downside is that if you are attacked by a pyro, it ‘melts’ and takes a full ten seconds to regenerate. Using this knife with the dead ringer is a tad overkill, as getting hit by a pyro will pop BOTH your DR and your knife. I suggest using it in conjunction with the cloak and dagger.

    If there is one mistake I see novice spies make time and time again, it’s forgoing the use of their revolver. You revolver is actually quite powerful, it can drop the lighter classes in three hits and can make you a threat even if your cover has been blow. I recommend the vanilla revolver, because it has no drawbacks and will preform the best in most situations. The enforcer used to trump the revolver before its nerf, but these days I see it as pretty much a straight downgrade to the revolver. The ambassador can be better than the vanilla revolver if you are very confident in your aim, but if you can't consistently get that opening headshot it's not worth it. I can see value in the L’tranger. When your cover is blown and your dead ringer is on cooldown, you can use it to quickly fill up your cloak so you can escape.

    So, there’s our loadout settled. Used the dead ringer with the vanilla knife, and either the vanilla revolver or the L’tranger, OR, use the cloak and dagger with the spycicle and vanilla revolver. Let’s see what you should know about the spy.

    Our first lesson begins before even leaving spawn – what class should I disguise as?

    Of all the classes, I feel that The Spy, Sniper, and Scout are the best disguise choices. Of the three, I feel that the spy is the most potent. He doesn’t arouse as much suspicion by preforming ‘strange’ actions, such as running the wrong way or not firing on the enemy team.
    Snipers are another good choice because they spend most of their time at the back of the team. They are also less spatially aware of enemies in close proximity, so they are less likely to spot you.

    The scout seems like a bad disguise choice, but it’s actually one of the best ones. While people are quick to point out that you can’t double jump and you run slower, players tend not to notice these things because the scout, unlike the sniper, is constantly mobile. He’s more like a buzzing fly in teammates peripheral vision.

    A couple of quick disguise tips – constantly change your disguise. If you kill someone, change your disguise. If someone spots you, change your disguise. If someone pops your dead ringer, change your disguise. While I did detail the three most believable disguises, don’t be afraid to use your own judgement on using the other disguises if the situation calls for it. If you know for sure that the enemy team doesn’t have any members of a certain class, DON’T disguise as that class. Lastly, changing disguises gives off an identifiable puff of smoke so try and remain hidden while disguising.

    Ok, with that out of the way, we can get down to actual point-and-shoot (and point-and-stab) tactics. First and foremost, the spy is an assassin. That means he specializes in taking out priority targets. Unfortunately, priority targets are usually the most difficult to kill. Let’s have a look.

    Your top priorities are:
    1.    Medics with full uber
    2.    Engineers with a full sentry nest
    3.    Demomen with a sticky trap set out.

    While the easiest targets to kill are
    1.    Snipers
    2.    Heavies firing on your team
    3.    Engineers without a sentry nest

    Being a good spy means keeping these priorities in mind. Use your judgement to determine wether to go after a high priority target, or play it safe and eliminate the easiest targets. For example, while it is tempting to try and take out that medic on full ubercharge ready to turn an enemy heavy into a big glowing red ball of hurt, medics, especially with a full uberchage, are faster than you, constantly moving around, and more that likely actively looking out for spies as they don’t really need to be looking directly at the heavy’s back to heal him. In this case, just kill the damn heavy. Sure, the medic might get away, but best case scenario your teammates pounce on him and worst case scenario you avert an ubercharge your team is unprepared for.

    Another tip that I just can’t stress enough is to use you revolver. So many spies forget they even have a gun, yet in reality, anywhere from 25-50% of my kills are from shooting people in the face. If you spot an obvious spy running towards you, shoot him in his dumb face. For whatever stupid reason, most spy vs spy fights involve both spies running in circles trying to desperately backstab the other. Fuck that, blow his head off.

    While the general rule of thumb is to not mess with pyros and scouts because they are faster than you and are quite good at killing you, feel free to take pot shots at them when you see them retreating with low health, or are distracted with other targets. Taking out an enemy pyro makes taking out the rest of their team so much easier.

    When your cover is blow and they are chasing you out of their base, try to backpedal and fire shots. If your dead ringer is fully charged, looking like you tried to put up a fight before using it makes your ‘death’ a lot more believable than a spy that just dies instantly.

    Just like in my heavy guide, to master the spy you really need to know the ambush points of every map. Think about how you would run through a map as any other class, what areas are you likely to skim over. Take this example. As players run over this ledge, they actually fall a little bit ahead of where the lip is. That means, while hiding in this location, most enemies will jump right over your head without even noticing you there.

    Once you’ve gotten yourself into an ambush spot, have patience. Players spawn in ‘waves’, so it’s safe to assume that they travel in said waves most of the time. Don’t stab the first person to walk by, give it a few seconds to make sure he doesn’t have any team-mates following him that will notice you slithering out from your hidey-hole. Now that you’re running with the team is the time to strike! Remember your priorty and easy target lists, choose your target, kill him, and most of the time, retreat. Don’t get greedy. Sometimes you can grab two or three kills in quick succession, such as when players are occupied with a payload cart, but most of the time it is much safer to get the one kill and then get out – activate your dead ringer and high-tail it to the closest ammo pack to recharge it.

    Oh, quick note on that. NEVER ENGAGE THE ENEMY IF YOUR DEAD RINGER IS NOT CHARGED! This is suicide. Even if it’s a single enemy, he might have an unseen ally in the background that will ruin your day. Remember that you can pick up ammo packs and fallen guns to make the dead ringer charge faster, or extend its cloak duration if it’s already active.

    Lastly, a quick note on engineer nests. If the engineer is nearby, but not actively whacking on his gun and there are no other enemies around, sap the gun kill the engineer when he comes to repair it. If the engineer is sitting right behind his gun, you can actually backstab him, and quickly sap the sentry before it turns around to shoot at you. If he’s not really in a position where this is possible, or if there are a lot of enemies around, just try constantly applying sappers to the gun and hopefully your team will notice and push into the nest before you get found out.

    I feel that’s about all I can teach you. Let’s recap
    1. Use a believable disguise – Spy, Sniper, or Scout
    2. Remember your priority and easy target list!
    3. Use your revolver. A lot
    4. Learn good ambush locations.
    5. Make sure to wait for all enemies to pass when attacking
    6. Never engage the enemy if your dead ringer is not charged.

    Thanks for watching guys, be sure to subscribe to my youtube channel and check out my twitter and blog for more content like this. There are links in the description. I update my blog every Wednesday, and plan on making guides for all nine TF2 classes!


    Liked this article? Check out my TF2 heavy guide!

    Subscribe to my Twitter and my YouTube channel to keep up to date on Steve's Game Blog news!

    Wednesday, 12 September 2012

    GUIDE: (Video) In-Depth Look at Team Fortress 2's Heavy


    Hey guys! Remember my Team Fortress 2 pubstar guide that I wrote all the way back in July? Well, it got some good feedback and I just love TF2 so much that I've decided to go deeper. Enjoy the first of hopefully all 9 in-depth class guides, featuring the fattest, most iconic TF2 class, and certainly my favourite TF2 class: the Heavy.


    TRANSCRIPT:

    Hey guys. My guide on basic tf2 strategy was a huge hit, so today I’ve decided to go a bit in-depth on my favourite TF2 class: The Heavy.

    At first glance, the heavy seems like a relatively simple class. You have a crapptone of health and you just point your mini-gun at the enemy and shoot it till it goes click.
    While the heavy is pretty easy to learn, its mastery comes in perfecting your movements, and attacking strategically.

    Unlike the traditional FPS classes such as scout and soldier, which require precision aim and twitch reflexes, the heavy relies on being in the right place at the right time. Your obvious weakness is your speed, both in movement and setting up your gun. A good heavy knows how to minimize these weaknesses through proper positioning, tactics, and loadout.

    But before we get into that, let’s have a look at the heavy’s arsenal. As I mentioned in my brief guide, I can’t recommended the tomislav enough – even with its spin-up-time nerf. It’s real star attribute is that It is completely silent when spun up, giving away the biggest tell that other players will use to discern your location. Simply put, a heavy whose location is known is no major threat. A heavy that pops out of no-where and fills you with more bullets than a John Woo movie is something to be scared of.

    Of course, there are exceptions to this rule. For example, if you have a dedicated medic, or if you are playing on a payload or attack/defend map, you should consider the alternate miniguns. The safest bet is usually the vanilla minigun. It does the second highest damage of all the miniguns, but has no real drawbacks. If you can get a medic to follow you around and watch your back, it’s the best weapon for chewing through enemy teams. The vanilla minigun is also good when you don’t have to, or want to be particularly sneaky, for example, on single-objective based maps like CTF, KOTH or Payload.

    I feel that Natascha is a lot more situational than the vanilla gun. It’s particularly useful against a scout-stacked team, or if your team is co-ordinated enough to make use of the slow, but otherwise its reduced damage isn’t worth it. Similarly, the increased damage of the brass beast is not even close to being worth accentuating your already-prevalent movement weakness. It does have a very small niche when you need to protect a stationary objective for a long time, such as in this KOTH map.

    The hou-long heater seems overly gimmicky. I’ve used it a couple of times and found that it burns through ammo way too quickly for the small benefit of the fire ring. While the fire ring is great for warding off spies, so is turning around every once in a while…

    Secondaries are pretty cut and dry. Even after the nerf, I feel that the sandvich is still an amazing item - especially if your team is medic-less. Just remember that spies and snipers will think all their Christmases have e come at once if they spot you eating in the open, so always get to cover and for god’s sake, put your back up against a wall, when noming your sandvich. With a medic, a shotgun or the family business can be viable, but I still think the sandvich is more versatile.

    Melee is even more obvious. The heavy is the slowest class in the game. The heavy also does not really use his melee weapon much, if you run out of ammo with your mini gun and have to switch to melee, you’re pretty much fucked. So, why not fill that useless melee slot with an item that turns you from the slowest class into one of the fastest? The gloves of running urgently, or G.R.U for short, drastically increase your run speed while active, with the drawback of ‘marking you for death’. This mark lasts while you have the gloves out, as well as for a few seconds after switching to another weapon, and it turns all damage done to you into minicrits.

    These gloves are amazing. They can get you to the battlefield in due speed or facilitate a hasty retreat – the two things that were previously impossible for a heavy to accomplish. The ‘marked for death’ drawback is something you should be aware of. Whenever possible, switch back to your main weapon a few seconds before arriving at a battlezone, to ensure you’re not taking minicrit damage while trying to fight. Even with a medic, these gloves are worth it as you won’t have to worry about slowing him down as you try to get around the map.

    So we've got our loadout set. Tomislav or Vanilla Minigun, Sandvich, and the G.R.U. Now let's have a look at some heavy tactics.

    As I mentioned before, the heavy's weakness is his speed and vulnerability while firing. These weaknesses are most prevalent when in large, open areas, so please. Stay out of them. Here's an example of what not to do. I'm playing payload and pushing the cart. Notice that coming up is a very long, open corridor, that is often a popular sniper spot. BAM! I walked right into it. My number one piece of advice? Know your corners. Stay out of the open as much as possible, and try to slink around corners where you can keep out of line-of-sight. It's not just snipers you wanna watch out for, but also soldiers, demomen, and other heavies chipping away at your health. Having good positioning is vital to playing heavy. Note my position in many of these clips, I always keep myself close to cover and close to medpack and ammo spawns, so I can strategically retreat when needed.

    Here's a neat little trick that I like to use a lot, jumping around corners. While in the air, you don't suffer from the speed reduction of spinning up your gun. This means you can jump around a corner, and if you are lucky, catch someone completely off guard. I do the jump+m2 at pretty much every corner I come to. You can also use this trick if you have high ground, to jump down at enemies, again, catching them off guard. Drop heavy to the rescue!

    Remember that while you are somewhat viable while moving, you are EXTREMELY viable while firing. The best way to combat this? Only fire in short bursts. If you come around a corner and see some enemies in mid to long range, don't sit there trying to chip them away. Shoot a burst at them and then change positions. The longer you stay in one place spraying and praying, the bigger the chance of a sniper picking you off, an explosives class chipping you down, or a spy sticking his knife into your big fat back.

    Bloody spies. Spies and snipers are the 'hard counters' to heavies. Snipers are easy enough to deal with - they are all about area control, so you can simply... avoid the area that they control! Spies are a little more tricky. Here's a sound you should memorize. It's the sound of a dead ringer spy de-cloaking. The other spy watches have somewhat less noticeable decloak sounds, but I've noticed, especially in PUB servers, that the dead ringer is by far the most popular. As soon as you hear this sound, do an immediate 180 and fire off a burst. You should spy check at least every ten seconds or so - spin around and shoot anyone who looks suspicious. Remember to look for the obvious spy tells, such as scouts running too slow, teammates who aren't firing their weapons, and seeing teammates who are 'dead'.

    I touched on this earlier but I'd like to emphasize it. PUT YOUR BACK TO THE WALL WHEN EATING A SANDVICH. Seriously.

    As you may have noticed, the heavy runs dry quite quickly. The heavy is quick to brag that it costs four hundred thousand dollars to fire his gun for twelve seconds, but fails to acknowledge that twelve seconds of continuous firing would use up all the ammo he can carry. As such, you need to be mindful of the ammo placements in the maps. This is not really something I can teach, you have to learn them yourself by playing the maps. I usually back out to look for ammo whenever I have fewer than 100 bullets.

    That's about all there is to it. In summary, Use your G.R.U to utilize ambush spots, stay out of the open, fire in bursts, stay in cover when eating a sandvich, and keep an eye on your ammo counter. Good hunting!


    Liked this article? Check out my basic pub TF2 strategy guide

    Subscribe to my Twitter and my YouTube channel to keep up to date on Steve's Game Blog news!

    Friday, 17 August 2012

    PSA: (Video) KILL MANY ROBOTS, AKA - Why you should be playing TF2 RIGHT NOW!


    Because I love all of my readers so much, here's a special bonus video, even though it's not Wednesday. Who knows, maybe I'll start updating TWO times a week! Holy smokes.


    PS: The posting of this video in no way guarantees more than a single update per week, and in some cases (hungover, laziness), not even that.

    My steamid is 'thetacoman' if you're interested in playing with me! I also occasionally host a MvM server.


    Liked this video? Check out my PSA on Diablo III patch 1.04!

    Thursday, 26 July 2012

    GUIDE: So you wanna be a TF2 pubstar?

    Team Fortress 2 is one of a few games that I am really, really good at. When I lived back in Australia, I played in a competitive team in ladder and league matches. These days, I still find myself coming back to it every once in a while because it’s just so damn fun. A ‘pubstar’ is a little joke we have in the competitive community, which describes someone who performs well in a public server, IE, the servers publicly available for anyone to join. It’s a joke because the difference between competitive and public TF2 is like night and day. There are skills, items, and play styles that will allow you to dominate a public server but would just be embarrassing if used in a competitive match. Today, I aim to teach you some of these ‘pubstar’ strategies and item combinations, so you too can make free-to-play n00bs suck it down.

    The Soldier:


    Note: 'I cast magic missile' is a re-named black box
    Primary: The Black Box 
    Secondary: Shotgun
    Melee: The Escape Plan

    Why the Black Box? Let me run some (made up but relatively accurate) statistics by you. At least 70% of games you play won’t have a medic. 20% will have a medic that sits behind a single heavy for the entire game and 9% will have just plain terrible medics that don’t understand survivability and will die before building an uber. That means you will have a competent medic in exactly 1% of the games you play. Many of these loadouts include a way to self-heal in order to offset the fact that you probably won’t have a medic. The Black Box is one of the best self-heal items in the game, as it is a passive self heal that happens every time you deal damage. If you are careful and spam a lot, you can easily get yourself back to full health after skirmishes. The vanilla shotgun is necessary as with the smaller clip on the Black Box you really need a quick way to do a bit of extra damage, and the Escape Plan is a no-brainer even after its damage nerf.

    Pro-tips:

    Never rocket jump without a fully reloaded launcher unless you absolutely have to escape somewhere. If you are in a fight and run out of ammo, 9 times out of 10 it is much more efficient to switch to your shotgun to finish them off than try and reload. Try to keep an eye on your ammo - if you are spamming it can run low pretty fast. Lastly, only ever use your equalizer to ESCAPE. Never try to run in and hit people with it.

    The Scout:


    Primary: Shortstop
    Secondary: Mad Milk
    Melee: Vanilla Bat/Holy Mackerel

    Poor scout. For whatever reason, a good chunk of his unlockable weapons completely suck. Fortunately, the milk man, an item set released fairly early in TF2’s item lifecycle, is one of the best. The shortstop is slightly more forgiving than the scatter gun as it has a tighter spread meaning you can engage targets from a greater range, and it fires shots in very rapid succession meaning that you’ll probably hit at least one shot per clip. The mad milk is another great little self heal that can also help out your entire team if you manage to soak a big bunch of enemies with it. If you have them, using the holy mackerel and the milk man hat will give you an extra 25 HP. Props to Valve for making completely balanced set bonuses…

    Pro-tips: Never stop moving. As a scout, movement is your best weapon. Learn the limits of your double jump. Most maps have many areas built with double jumps in mind. If you learn them, you can get places even faster. Don’t be afraid to disengage. If you come across a heavy that is spinning up his minigun, for the love of god don’t try to fight him. Be exceptionally careful of sentries. Even a mini-sentry can make life extremely difficult for a scout. Listen for their telltale beeps to avoid coming round a corner and getting gibbed.

    The Heavy:


    Primary: The Tomislav
    Secondary: The Sandvich
    Melee: The Gloves of Running Urgently

    This is what I like to call the ‘stealth mountain’. The heavy’s biggest weaknesses are his immense size, slow speed, and the noise he makes when spinning up his minigun. When you have a competent medic, these aren’t so much of a problem, but playing solo will often see your enemies avoid you, chip away at your HP with hit-and-runs, or ambush you. This build lets you turn the tables and ambush them! First, use the GRU to get to places fast. Make sure you switch them out a few moments before arriving at a battlezone, as they will debuff you to take extra damage while being used and for a few seconds after switching. The tomislav does less damage than the heavy’s other miniguns, but it makes no sound while being ‘spun up’. Use this to your advantage! So many times I have used the GRU to quickly get to a choke point, then spun up my tomislav and absolutely eaten through anyone that came through, as they didn’t expect a heavy to be so close so fast. The sandvich, even after the nerf that stops you from picking up your own sandviches, is still a very viable self-heal.

    Pro-tips: Always, ALWAYS eat your sandvich with your back to a wall. A heavy eating a sandvich with his back exposed is a spy’s wet dream. Jump around corners. While in the air, you don’t suffer from the movement speed slowdown of spinning up your gun. This means you can jump around a corner, and have your gun spun up and ready to fire as soon as you land. This is amazing for ambushing.

    The Demoknight:


    Primary: Grenade Launcher
    Secondary: Chargin’ Targe
    Melee: Eyelander

    This is the perfect example of a loadout that will get you laughed out of a competitive TF2 game, yet can absolutely melt public servers. The problem with most demoknights is they tend to think of their swords as a primary weapon. Don’t do that. Use the grenade launcher as your primary, and only switch to the sword to finish them off. If you are careful, you can easily collect four heads and then be an explosives demon. I still like the Chargin’ Targe better than the Splendid Screen, as it’s a bigger damage reduction versus the Splendid Screen’s extra charge damage, which like I said is not something you should be using too much.

    Pro-tips: Scouts will eat you alive. When fighting a scout, it’s incredibly hard to hit them with grenades, so this is the only time I’ll allow you to use your sword as a primary. Don’t be afraid to use your targin’ targe to escape. If you’re low on health, rather than smashing into the enemy in a last ditch attempt to kill them with your sword, consider just charging the fuck out of there, especially if you already have 3-4 heads collected.

    The Sniper:


    Note: 'The frying pan' is an alternate skin for the kukuri
    Primary: The Huntsman
    Secondary: Jarate
    Melee: Own choice (Bushwhacker/Tribalman’s Shiv/Vanilla Kukuri)

    Ahhh, the bow sniper. The bow sniper was the first time many TF2 fans thought ‘what the hell is Valve thinking?’ Nicknamed ‘the lucksman,’ the huntsman is incredibly effective in heavily populated public servers. Try joining a payload/payload race game and just flinging arrows in the direction of their cart. You’ll be top of the scoreboard in no time. Jarate helps you with assists, and also with anyone who tries to engage you in close range. Melee is own choice – I personally prefer the Tribalman’s Shiv as the bleed damage can help with those pesky spies - but the others choices are just as good.

    Protips: There are none. Just fling arrows towards where you think your enemies are. This build is as brainless as it is effective. That said, it’s a lot more effective on maps where the teams tend to clump up, like payload and CP. It’s not as good on CTF. If I see you using the razorback I will hunt you down.

    The Medic:


    Note: 'IDDQD' is a re-named medigun
    Primary: The Blutsauger
    Secondary: Vanilla Medigun
    Melee: The Ubersaw

    Hold on, you want to play the MEDIC in a PUB? You’re braver than I thought. The only thing worse than being a competent heal target with a terrible medic, is being a competent medic with a terrible heal target. But if you do come across a server with players that warrant healing, feel free to try this build out. The Blutsauger and ubersaw are there because you don’t trust your heal target to protect you from scouts and spies. Most pub spies are dumb as hell, meaning that they will try and kill you and instead just give you 50% to your ubercharge thanks to your ubersaw. Scouts are pretty easy to take out with the blutsauger, and bad pyros will hilariously try and chase you while you can just backpedal and pummel them with needles. The vanilla medigun is still your safest bet for those ‘oh shit!’ moments, as the kritzkrieg really only shines when you have good communication with your heal target. The quick fix is terrible.

    Pro-tips: Ditch everyone at the first sign of danger. Holding onto your ubercharge percent is more important than keeping your target alive 90% of the time. Make sure you constantly switch targets to keep all of your teammates overhealed. When deciding who to pocket, you can actually use hats to tell who warrants it. Avoid pocketing anyone with the Ghastly Gibus or Treasure Hat. Anyone with the Primeval Warrior badge has been playing this game since beta and you should probably throw them a heal.

    The Spy:


    Note: 'the big kill' is an alternate skin for the revolver
    Primary: Vanilla Revolver
    Knife: The Spycicle
    Watch: The Dead Ringer

    This is my ‘stealth is for pussies’ spy build. While the dead ringer has fallen from its super overpowered heyday, it’s still an incredibly viable option for anyone who thinks sitting and waiting in the same spot for the entire game is boring. The Spycicle gives you an additional layer of protection against your greatest foe – the pyro, and the vanilla revolver just plain out performs most other revolver options in a standard fight, with the exception of the ambassador, which is only a possible choice if you have godly aim.

    Pro-tips: Try and put some distance between yourself and the enemy team if they pop your dead ringer, even more if they also melt your spycicle. Always wait until your Dead Ringer and spycicle are fully charged before heading back into enemy territory. If discovered buy an overzealous pyro or scout, backpedaling while firing your revolver can be surprisingly effective. When dealing with sentry nests, it’s usually best if you can backstab the engineer first, and then quickly sap his buildings. If you are right behind the sentry you should have enough time to do this before it turns around. While it is tempting to try and stab the medic, it’s usually a lot easier to just go for his heal target – especially if he is healing a soldier or heavy.

    The Engineer:


    Note: 'the lugermorph' is an alternate skin for the pistol
    Primary: Frontier Justice
    Secondary: Vanilla Pistol
    Melee: The Gunslinger

    This is my offensive engineer build. While it’s obviously bad in certain situations (when defending on an attack/defend or a payload map for example) it excels in most others. It’s particularly effective in maps that require you to be constantly moving your gear up, such as 5CP maps and offense on payload. Essentially, you want to put your mini-sentry down and then try and bait people to chase you into it using your pistol. If done right, you can store up a few crits with the Frontier Justice, which you can use to force yourself into more viable sentry positions.

    Pro-tips: Don’t forget the teleporter! Even if your team sucks, having the cannon fodder arrive at the front lines in a timely matter means that there will be less fire directed at you. Always have at least 100 metal before attempting to push into an enemy controlled zone, so you can place a mini sentry. If you pick up an existing mini-sentry, when you put it back down it will deploy much faster than a standard deployment.

    So there you have it, a set of tips and loadouts for every class that should help you out when playing in public servers. Thanks for reading, feel free to discuss your own TF2 tips and tricks in the comments.

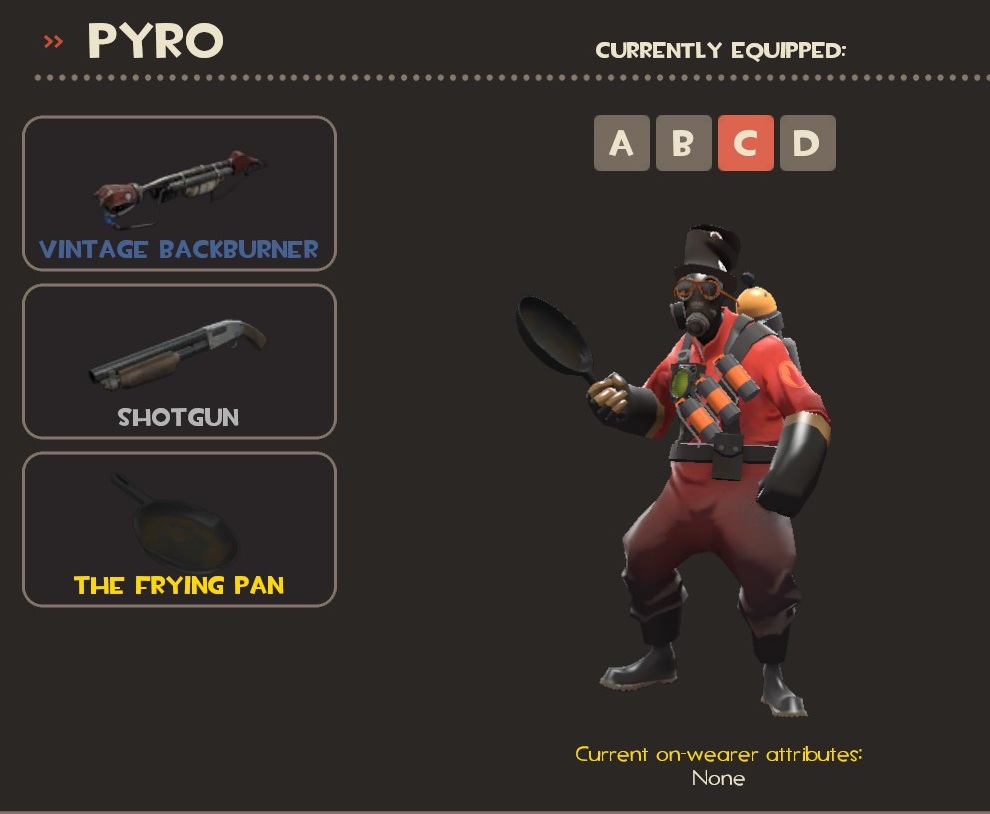
    Oh shit, I forgot about the pyro! Uhhhhh

    The Pyro:


    HUDDA HUDDA HUDDA


    Primary: Backburner
    Secondary: Whatever
    Melee: Whatever

    Pro-tips: W+M1


    Liked this article? Check out my In-depth guide to the Heavy!

    Subscribe to my Twitter and my YouTube channel to keep up to date on Steve's Game Blog news!